Making a multi-track tape recorder for MIDI in JavaScript
During quarantine I decided to start playing music again, and entered the world of synthesizers, "DAWless" setups, and inevitably MIDI. I currently have a Keystep 37, Roland MC-101, and Elektron Model:Cycles. The latter two devices are "grooveboxes" - standalone hardware that let you make music and live jam without a computer. They have different workflows, but in both you work mostly in sequences which let you compose in 4 or 8 bars at a time.
People who are good at playing live can make 4 bars last a long time - introducing instruments one at a time, modifying tones as they play, and muting/un-muting instruments are all techniques to keep a set going. I'm not much of a live performer - I prefer to make linear songs, with melodies that extend beyond the limits of my grooveboxes.
If you don't want to use the built-in sequencing of your devices, you're probably going to use a DAW to manage multiple MIDI tracks that send messages to your external devices to play notes. There are a lot of DAWs with good MIDI support, but a goal for me with my setup is to get away from a computer based workflow. I really wanted to sit down, start recording, and build up tracks with live recording instead of clicking notes on a keyboard roll. You can live record MIDI in these DAWs too, but it's cumbersome to set up the tracks and MIDI routing to get everything working, and I found the workflow for making quick edits to a track to be difficult.
When I searched for something similar, I kept coming back to 4-track tape recorders, which allow you to record multiple tracks to a cassette or reel-to-reel tape.

While limited, they're extremely easy to use. Press play, press record, and jam directly to tape. Famously The Beatles' Sgt. Pepper's Lonely Hearts Club Band was recorded entirely on 4-track, although that may have been more about the technology available at the time than the accessibility of using them. Anyway, I wanted a similar experience for MIDI - plug in my keyboard controller and my devices, press record, and jam without being slowed down by a DAW.
A modern take on this, and the closest user experience to what I wanted, is the Teenage Engineering OP-1's "tape mode" feature. In tape mode, you get one infinitely long tape where you can record your tracks live. I don't own an OP-1, but had watched enough videos about it to know that this was close to the experience I wanted for MIDI.

So, I got to work and created midi-tape, a web-based tape mode style recording software for external MIDI devices. Among other things I used the Web MIDI API, Web Audio API, and MediaRecorder API to power it, which was a good stress test of what a browser is capable of. If you have a few synths and a MIDI controller laying around, I encourage you to try it out!
I've done a few write ups of recent projects, but most are more narrative based and less about code. This time around I want to focus on how it works and give concrete examples of how I worked through issues instead, so if that interests you please keep reading!
Using Web MIDI to receive and send messages
One major reason I decided to make this a web app and not a local executable was that the Web MIDI API is very mature. It's one of the few APIs I've seen added that is basically fully featured, and one of the only ones I know of that allows you to control external devices (pending the WebUSB and Web Serial API).
To make Web MIDI more usable, I started using a wrapper library, djipco/webmidi.js. Using webmidi.js, I was able to read input from my MIDI controllers:
WebMidi.enable((err) => {
  WebMidi.inputs.forEach(function (input, key) {
    addInputListeners(input);
  });
  WebMidi.addListener("connected", function (e) {
    if (e.port.type === "input") {
      addInputListeners(e.port);
    }
    setDevicesByName();
  });
  WebMidi.addListener("disconnected", function (e) {
    setDevicesByName();
  });
});
function addInputListeners(input) {
  input.removeListener("noteon");
  input.removeListener("noteoff");
  input.removeListener("pitchbend");
  input.removeListener("controlchange");
  input.addListener("noteon", "all", onNoteOn);
  input.addListener("noteoff", "all", onNoteOff);
  input.addListener("pitchbend", "all", onPitchBend);
  input.addListener("controlchange", "all", onControlChange);
}
In the above code sample, I initialize the Web MIDI API, attach event listeners for all the existing inputs, and then set up listeners to handle newly connected/disconnected devices. The real event handlers are quite complex, but here's a simplified "onNoteOn" which passes all noteOn events to an arbitrary output device:
function onNoteOn(event) {
  WebMidi.outputs[0].playNote(
    // You could also use event.note.number but this
    // is better for debugging.
    event.note.name + event.note.octave,
    event.channel,
    {
      velocity: event.velocity,
    }
  );
}
With a bit of a user interface to select input/output devices and channels, the code above would be enough to use your browser as a lightweight MIDI interface/host, which is pretty useful on its own.
In the real midi-tape code, there's a global variable that tracks the current input device, and all event handlers only handle events from that device. The output device is determined by the currently selected track. The global variable looks something like this:
let tape = {
  inputDevice: 0,
  inputDeviceName: "My keyboard",
  tracks: [
    outputDevice: 1,
    outputDeviceName: "My synth",
    outputChannel: 5,
  ],
};
You'll notice that the devices are referenced both by index and name - this allows for devices to be connected and disconnected at any time without the user having to re-configure mappings. The "setDevicesByName()" method referenced earlier is called anytime the devices change to enable this behavior.
This is about it for how MIDI messages are handled, but I wanted to call out a problem that I had throughout development - unfinished noteOn events. Imagine you're using the code above, press a key down on your keyboard, then disconnect that keyboard. Your synth would get a noteOn message but never get a noteOff message, resulting in an infinite tone. This was pretty annoying, so I made a utility function to stop all notes on all devices:
function stopAllNotes() {
  getOutputs().forEach(function (output) {
    output.stopNote("all");
  });
  tape.tracks.forEach(function (track, trackNumber) {
    getOutputDevice(trackNumber).sendPitchBend(0);
  });
  for (let key in justNoteOn) {
    let parts = key.split(":"); // ex: 0:C4
    getOutputDevice(parts[0]).stopNote(parts[1]);
  }
  justNoteOn = {};
}
I haven't edited this snippet from the original code - but know that "getOutputs" and "getOutputDevice" are just wrappers that allow for fake devices and error handling. "output.stopNote("all")" sends a "All Notes Off" MIDI CC (controller change) message, but I found that not all devices respect this, so I also had to add a global "justNoteOn" variable which tracks all unfinished notes for all output devices. I wanted to call this out as an example of how implementing MIDI isn't as simple as doing things the right way, not all devices are the same and not all share the same support for different "standard" CC messages.
Recording and making an accurate timer in JavaScript
Now that MIDI was set up, it was time to actually record and playback messages. My first big decision was to store data based on a current "step" instead of by time. The MIDI file format, and how you send things like the clock to devices, is very tied to steps so I figured this would be easier than time.
In MIDI, there's a concept called parts per quarter note or PPQ - this is the resolution that MIDI is stored in. The higher the PPQ, the more accurate the recording is. In a modern DAW this number could be extremely high, but on older sequencers it's typically in the 24 to 96 PPQ range. I designed the main callback of my code to be called once per step, but performance wise this was probably not wise as I was forced to lower my PPQ down to 24 to maintain consistent performance.
Let's look at what that main callback looks like and talk about timers in JavaScript. Here's a simplified code sample showing how notes are stored, and how they're played back every step:
let tape = {
  ppq: 24,
  bpm: 110,
  tracks: [
    {
      noteOn: {},
      noteOff: {},
    }
  ],
};
let step = 0;
function tick() {
  tape.tracks.forEach(function (track, trackNumber) {
    if (typeof track.noteOn[step] !== "undefined") {
      for (let note in track.noteOn[step]) {
        getOutputDevice(trackNumber).playNote(note, track.outputChannel, {
          velocity: track.noteOn[step][note],
        });
      }
    }
    if (typeof track.noteOff[step] !== "undefined") {
      track.noteOff[step].forEach(function (note) {
        getOutputDevice(trackNumber).stopNote(note, track.outputChannel);
      });
    }
  });
  step++;
}
To summarize, once per step we iterate over every track in the "tape", and if there are any messages to send we do so. To determine how many times to call tick() in milliseconds, you use the formula "60000 / (bpm * ppq)". So for the above example, that'd be about 23 milliseconds.
You'd think that code like this would work:
setInterval(tick, 23);
But setInterval is extremely unreliable, especially as users change tabs and reallocate resources. To make things more consistent, I created a new Web Worker just for the timing code so that it runs in its own thread. Web Workers also have more consistent performance when the page doesn't have focus. It still ended up running a little fast, so I also kept track of the last call time and offset the next setTimeout by the difference. This is again simplified, but the timer Web Worker script looks something like this:
var lastTick = 0;
var ppq = 24;
var bpm = 110;
var tickRate = 60000 / (bpm * ppq);
function tick() {
  let now = performance.now();
  if (lastTick === 0) {
    lastTick = now;
  }
  postMessage({});
  timeout = tickRate;
  var offset = now - lastTick - tickRate;
  timeout -= offset;
  setTimeout(tick, timeout);
  lastTick = now;
} tick();
The browser uses the Web Workers messages like this:
let timer = new Worker("timer.js");
timer.onmessage = () => {
  tick();
}
Hopefully if anyone tries something similar this helps - the BPM is very consistent now, although nothing in JavaScript is perfect.
That's most of how playback works, recording is simply a matter of getting the current global "step" and adding new data to the tape where needed.
Using steps instead of time makes changing the BPM simple since we just have to change how often tick() gets called. Steps also made implementing a metronome straightforward since I could just use the modulus operator:
// bpb -> beats per bar
// This is called once a bar
if (step % (tape.ppq * tape.bpb) === 0) {
  // I use Tone.js to generate the metronome clicks
  metronome_synth.triggerAttackRelease("C4", 0.1, Tone.context.currentTime);
// This is called for every other beat
} else if (step % tape.ppq === 0) {
  metronome_synth.triggerAttackRelease("C3", 0.1, Tone.context.currentTime);
}
And quantization as well:
// The step I played a note on
let setStep = step;
// Halving our PPQ means snapping to 8th notes
let multiple = tape.ppq / 2;
let newStep = setStep + multiple / 2;
// The quantized step that I can write data to
newStep = newStep - (newStep % multiple);
These features made me glad I decided to live in the world of steps, even though time would have been easier earlier on.
Saving, loading, and migrating tapes
For persisting the tape between sessions I use localForage, which is a great library for storing data without thinking of the implementation:
setInterval(function () {
  // lockTape lets me stop this behavior when loading new tapes
  if (!lockTape) {
    localforage.setItem("tape", tape);
  }
}, 500);
To store a tape long term, you download it as a JSON file. You can then upload that JSON file at any time to start editing it again. Here's my code for this that I think can be used for any similar application:
function load() {
  let input = document.createElement("input");
  input.type = "file";
  input.onchange = function (event) {
    let reader = new FileReader();
    reader.onload = function (event) {
      lockTape = true;
      tape = JSON.parse(event.target.result);
      // Will talk about this soon
      migrateTape(tape);
      // Store it in localForage immediately
      storeTape();
      location.reload();
    };
    reader.readAsText(event.target.files[0]);
  };
  input.click();
}
I've used this pattern a few times and I really like it, you can build fairly complex web apps without having any backend. You may notice the "migrateTape" method above - just like writing a piece of desktop software, users may load files that were created long before the current release. With that in mind, storing a version in your JSON is very useful for handling upgrades to the data format later on. Here's an example of the first migration in midi-tape, for when I introduced naming tapes:
function migrateTape(tape) {
  if (tape.version === 1 && typeof tape.name === "undefined") {
    tape.name = "midi-tape";
    tape.version = 2;
  }
  // I then run every other migration sequentially
}
Hopefully you'll be able to use midi-tape now, save a tape, and come back to it in years without any issues.
Another data storage thing I wanted to show was how I implemented undo/redo. Basically, you maintain a stack of JSON encoded copies of the tape for undo, and a stack for redo. Every time undo is called, you push the current tape onto the redo stack, and pop from the undo stack. With extremely large JSON objects you would probably want to use a command pattern where you would instead have a stack of actions performed, or diffs of the object, but this worked fine for my use case:
let tapeUndo = [];
let tapeRedo = [];
function undo() {
  if (!tapeUndo.length) {
    return;
  }
  pushRedo();
  tape = JSON.parse(tapeUndo.pop());
}
function redo() {
  if (!tapeRedo.length) {
    return;
  }
  pushUndo();
  tape = JSON.parse(tapeRedo.pop());
}
function pushUndo() {
  tapeUndo.push(JSON.stringify(tape));
}
function pushRedo() {
  tapeRedo.push(JSON.stringify(tape));
}
A simple user interface with surprisingly complex interactions
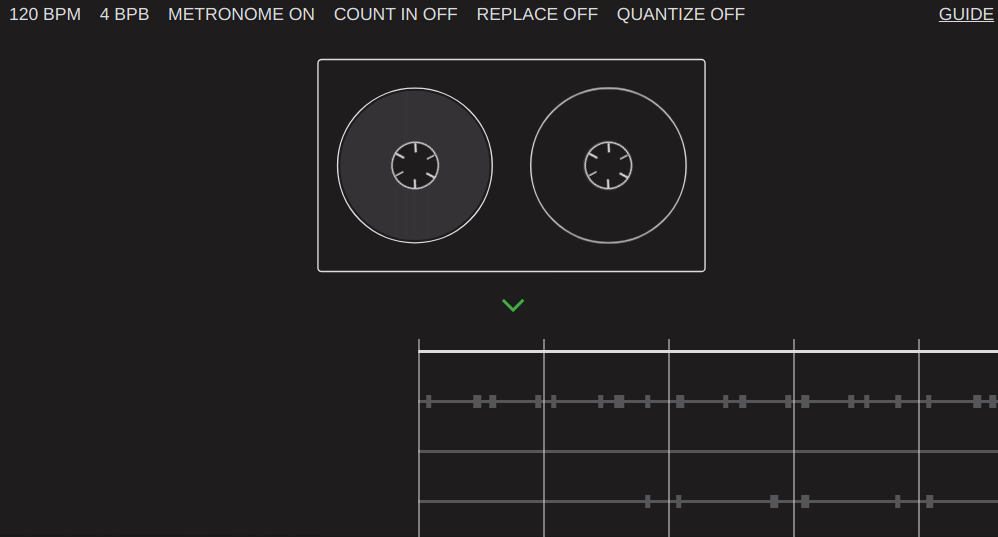
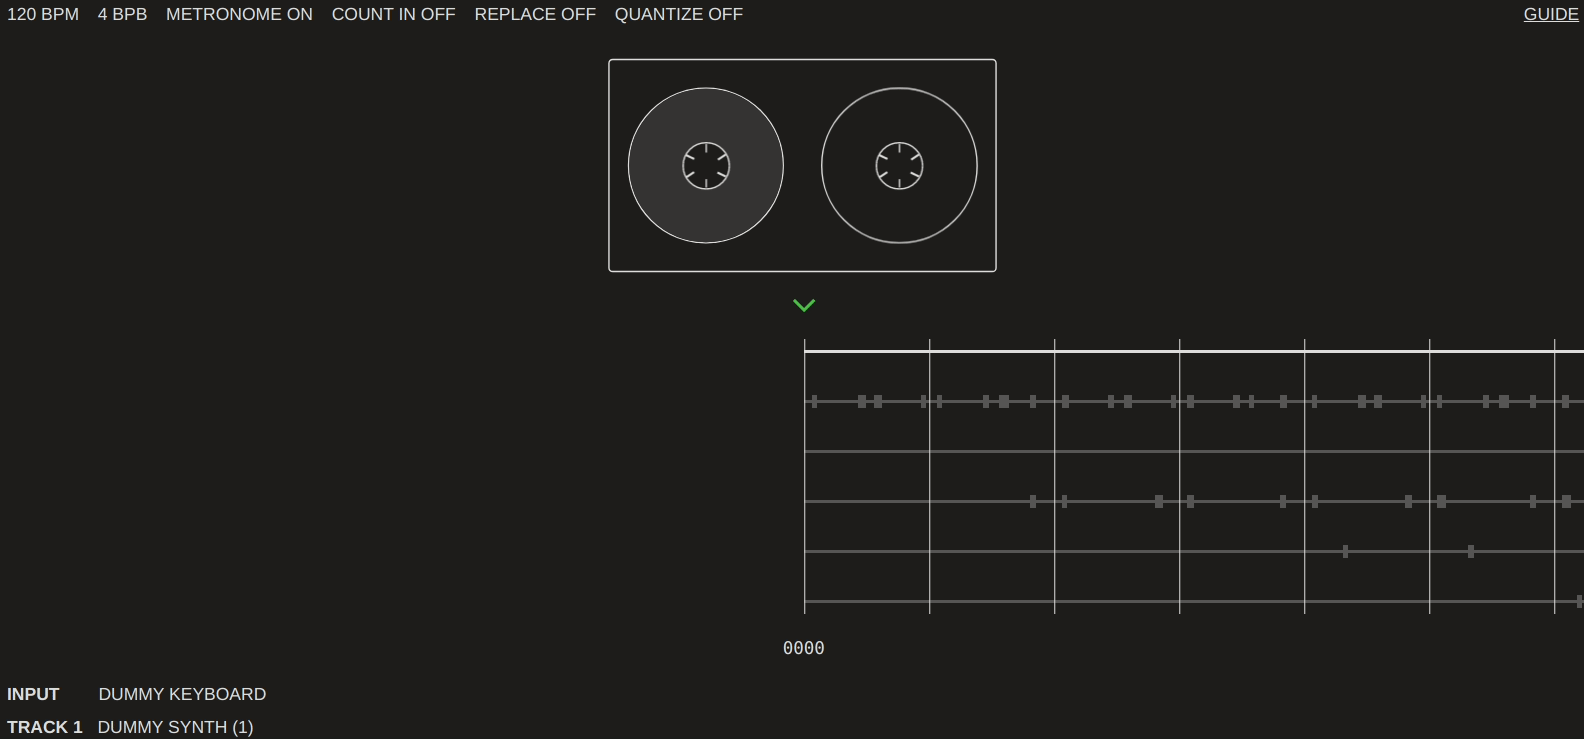
Of course the most important part of the project was that there's a cassette tape on the screen. Without it, how would you know you're recording to a digital tape?
Jokes aside, the visuals for this project were important for me. In the GIF above, you can see that the tape quickly shows you where you're at in the song, but also spins as the timeline moves. When you do a big jump (from bar to bar) it does a longer spin and slows to a stop. Doing these little polish details is what sets some interfaces apart, making something that's fun to interact with it more than making it utilitarian. It also took me an unbelievable amount of time to get working well.
Beyond some basic text indicators, the only other element worth discussing is the timeline. Each track is on a horizontal line, with recorded notes showing up only to remind you that's something there. Unlike a DAW, there is no way to edit notes after they're recorded, so there's no point in displaying the notes chromatically. You move along the timeline with the arrow keys (up/down changes track, left/right changes the step), and can use other key combinations to enable recording, set timeline markers, delete, copy, paste, and more.
Here's a demo showing me move on the timeline, set markers, play for a bit, and toggle recording:
As I mentioned all interaction with midi-tape is done on the keyboard. This was important to me as it enables future integrations with embedded hardware - for example a Raspberry Pi, small LCD, and a numpad could work midi-tape with no other interactions. It's also fast - using a mouse completely takes me out of things when I'm recording so quickly making edits is important.
I was thinking of putting code samples here but don't think they're very exciting - I'm using vanilla JavaScript, CSS, and HTML to display everything without any framework. It's messy, but it worked well and I know I can come back to this project in a few years and not have to remember what syntax has changed in that time.
Exporting to a real .midi file
You may have noticed that the format that midi-tape uses for storage is not a .midi file. I made this choice early on because I wanted the "tape" object to reflect what midi-tape can do, and exporting/importing .midi would either mean data loss or supporting all the quirks of MIDI files, of which there are many.
Towards the end of the project I did decide to implement .midi export as a one-way operation, so I thought I'd share that code:
let smf = new JZZ.MIDI.SMF(0, tape.ppq);
tape.tracks.forEach(function (track) {
  let trk = new JZZ.MIDI.SMF.MTrk();
  smf.push(trk);
  trk.add(0, JZZ.MIDI.smfBPM(tape.bpm));
  // maxStep is a magical global storing the
  // last recorded step
  for (let i = 0; i <= maxStep; ++i) {
    let midiStep = i;
    if (typeof track.noteOn[i] !== "undefined") {
      for (let note in track.noteOn[i]) {
        trk.add(
          midiStep,
          // We store velocity as a percentage
          JZZ.MIDI.noteOn(0, note, 127 * track.noteOn[i][note])
        );
      }
    }
    if (typeof track.noteOff[i] !== "undefined") {
      track.noteOff[i].forEach(function (note) {
        trk.add(midiStep, JZZ.MIDI.noteOff(0, note));
      });
    }
  }
});
// Save this as a .midi file!
smf.dump();
I'm using Jazz-MIDI, which if you don't know is a really great set of extensions and GitHub projects for dealing with Web MIDI. I think I tried every MIDI-file-writing library out there before landing on this, there's a huge focus on accuracy with these JZZ packages, check them out if you ever need to dig deep into MIDI stuff.
Monitoring and recording audio
The most recent feature I added is audio monitoring and recording. Let's say you're using midi-tape with one external device, or many devices and one audio interface, and want to monitor on your computer (maybe to hear the metronome better), or you want to quickly record a play through of your tape. DAWs are great at this, obviously, but why am I doing a quick session with midi-tape if I have to use a DAW anyway?
So I used a few newer web APIs and added a quick "Monitor" button which listens to whatever device you give midi-tape access to, and a "Record" button which rewinds the tape, enables recording using the MediaStream Recording API, and plays the whole tape through.
Here's some cleaned up code snippets that may help you implement something similar:
let audioChunks = [];
let audioContext, microphone, mediaRecorder;
// Ask the browser for a user's device
navigator.getUserMedia(
  {
    audio: {
      // These are very bad for recording instruments
      echoCancellation: false,
      autoGainControl: false,
      noiseSuppression: false,
    },
  },
  (stream) => {
    audioContext = new AudioContext();
    microphone = audioContext.createMediaStreamSource(stream);
    mediaRecorder = new MediaRecorder(stream, {
      mimeType: "audio/webm",
    });
    mediaRecorder.ondataavailable = (e) => {
      audioChunks.push(e.data);
    };
    mediaRecorder.onstop = onMediaRecorderStop;
  },
  () => {
    alert("Error configuring microphone.");
  }
);
// Then later on you can enable monitoring
microphone.connect(audioContext.destination);
// And start recording
mediaRecorder.start();
// When you're finished call mediaRecorder.stop() and create a file
let blob = new Blob(audioChunks, { type: "audio/webm" });
A song to say goodbye
Wow, what a long post. Thanks for reading this far if any of you made it. I'll leave you with a recording I recently made with midi-tape and my Elektron Model:Cycles (I'm making music for a video game I'm working on):